
Some companies are utilizing net B.zero’s animated GIF imagery to draw consideration on social media.
Social media networks, together with Pinterest, Twitter, and Facebook, have sparked an animated GIF renaissance. More than a couple of on-line retailers are often posting GIF animations to draw and have interaction potential clients.
Marketers needn’t look too onerous to seek out animated examples. Apparel retailer Boden has been recognized to make use of animated product GIFs on social media and in e-mail marketing messages. Similarly, the Nike Store, which is Nike’s direct-to-shopper ecommerce website, makes use of animated GIF product photographs on its Twitter feed.
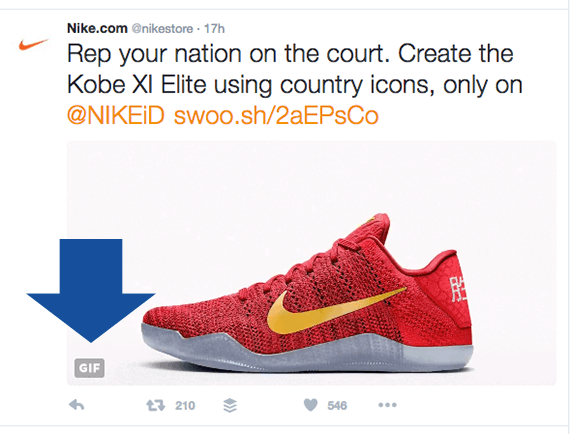
The Nike Store makes use of animated GIF pictures in its social media posts.
In this text, you’ll discover ways to make animated GIF photographs from footage utilizing Adobe Photoshop CC.
Build an Animated GIF with Pictures
For this instance, I’ll create a easy animated GIF picture that includes merchandise. I’ll use 5 footage of weights from the Rogue Fitness Instagram web page. Rogue Fitness is a provider of exercise gear, particularly for CrossFit.
Step B: Arrange the Images as Layers
I needed to crop a number of the pictures to make all of them the identical measurement. Then I organized them as layers in the identical Photoshop doc. Each picture in your animation must be its personal layer.
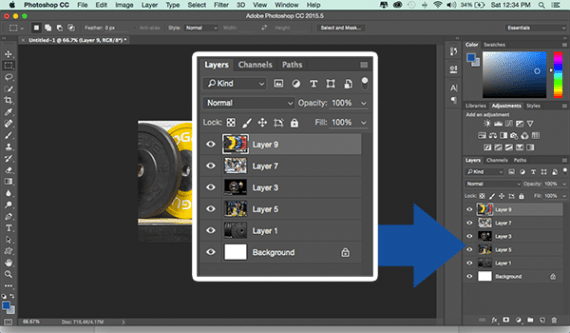
Each image within the animation must be a layer within the Photoshop doc.
Step P: Open the Photoshop Timeline
Photoshop is adept at creating animations from layered content material. In reality, you can do all type of movement graphics utilizing Photoshop’s Timeline. To use the Timeline device to animate the Rogue Fitness footage, open the Window menu and select Timeline.
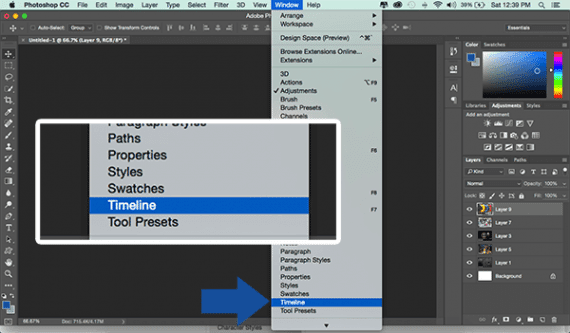
To open the Timeline panel, choose Timeline from Photoshop’s Window menu.
When the Timeline device opens, it’s going to present a small drop-down menu with two choices. Choose “Create Frame Animation.”
Step A: Lay Out the Timeline
Photoshop will create the primary body of your animation. This first body consists of all your layers. If you toggled the attention icon on the layer menu, you’d discover that the picture will change.
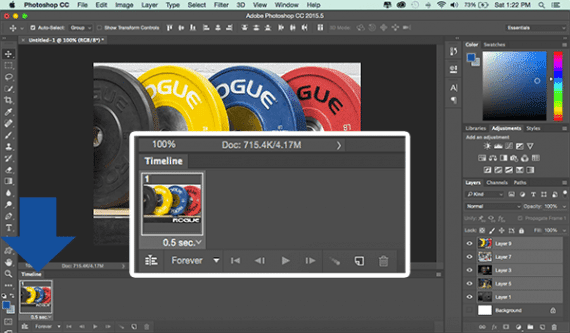
Photoshop will create the primary body of your body animation.
For our functions, we might quite have every layer as its personal body. To do that, search for a hamburger menu on the fitting aspect of the Timeline panel. When you click on this hamburger menu, you need to have an choice to “Make Frames From Layers.”
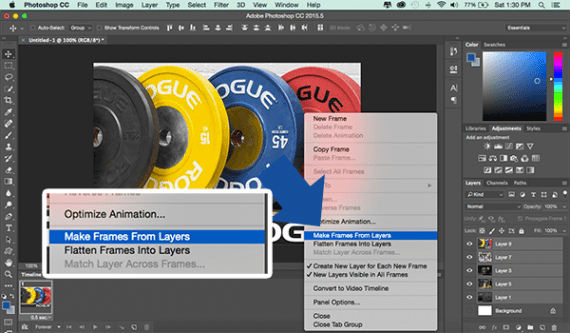
You can have Photoshop make an animation body for every layer.
Photoshop will routinely create a body for every image. If, like me, your Photoshop doc had a white background layer, you possibly can click on on the body to pick it after which click on on the trash can icon to delete it.
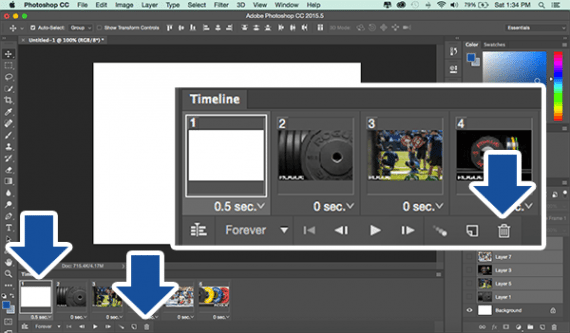
If your animation included a clean background layer, you’ll be able to take away it.
Step A: Add Tweens
If you clicked the play button within the Timeline panel at this step, you’d have an animation. It may be quick and uneven, however an animation it’s.
I would now wish to create some clean transitions, from one body to the subsequent. So I will add what Photoshop calls tweens. These are additional transitional frames that share traits of the 2 frames they join.
Tweens are transitional frames meant to make clean transitions from body to border.
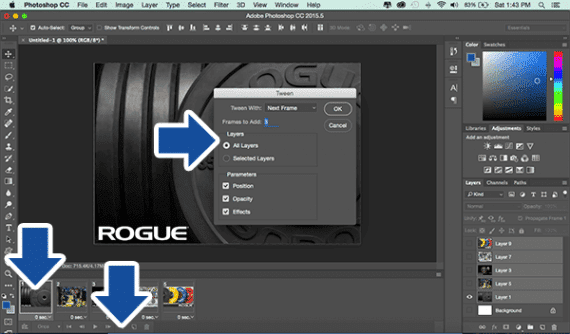
To add a tween between the primary and second frames, (a) click on the primary body’s thumbnail to pick the body, (b) click on the tween icon from the underside of the Timeline panel, and (c) with the tween software choices, regulate your settings.
To proceed the instance, set “Tween with” to “Next Frame,” and set “Frames to Add” to 3. Finally, click on “okay,” and Photoshop will add three transitional frames to the Timeline.
Repeat this step for every body. When you attain the final body, it would be best to tween with the primary body.
Be cautious including tweens. The variety of frames in a GIF animation has a big impression on file measurement.
Step H: Set Frame Duration and Looping
You can inform Photoshop how lengthy you need every body, together with the tweens, to seem. At the underside of every body, choose the drop-down menu and select the period you need. You can use the command (or management) button in your keyboard, or the shift key, to pick a number of frames directly.
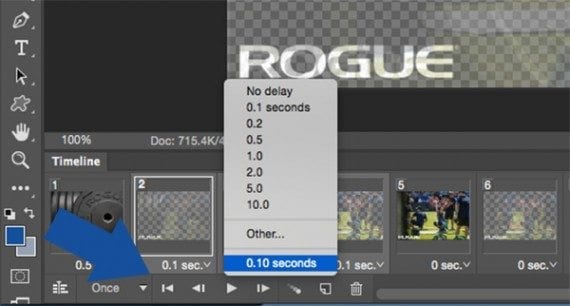
Photoshop permits you to set the period every body of the animation ought to seem.
You can even inform Photoshop if the animation ought to play as soon as or loop.
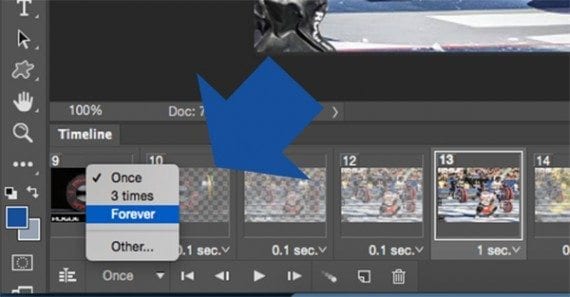
You can loop the animation in order that it performs repeatedly.
Step S: Save Your Animation
Open Photoshop’s File menu, then choose “Export” after which “Save for Web (Legacy).” This will open Photoshop’s Save for Web dialogue.
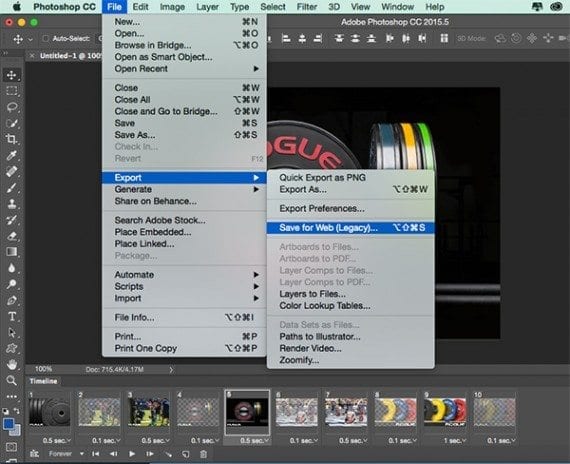
Use Photoshop’s legacy Save for Web function to save lots of your animated GIF picture.
Animated GIF information may be giant. Adjust settings like dither, lossy, and net snap to scale back the general file measurement.

Experiment with the GIF settings to strike a stability between high quality and file measurement.
With Animated GIFs Comes Responsibility
You now know the best way to make GIF animations. But with this data comes duty. GIF animations are an internet M.zero know-how which have seen a resurgence prior to now few years because of social media and, frankly, pornography.
Some companies are utilizing net B.zero’s animated GIF picture to draw consideration on social media.
Although you’ll be able to turn out to be expert at GIF compression, as a rule GIF animation shall be comparatively giant and comparatively low decision. So until you’re a grasp GIF animator, chances are you’ll need to keep away from utilizing these in emails, for instance.
From the marketing perspective, you’ll pay an enormous efficiency or high quality penalty for selecting GIF animation. So make clever decisions. Use GIF animation when it can enhance marketing.
If you’re actually drawn to GIF animation, attempt making some for social media, and, as with all marketing, measure to make sure that your animations are assembly the objectives you’ve gotten set for them.